
Enterprise Recon 2.16.1
Single Sign-On (SSO)
You can enable the single sign-on feature for your organization to allow users to log in to ER2 using the credentials for the configured OpenID Connect (OIDC) provider.
As of Enterprise Recon 2.16.1, only Microsoft Entra is the supported provider.
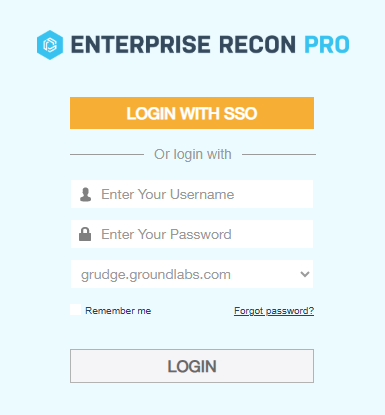
To do this, you must:
- Configure Microsoft Entra Account
- Configure OIDC Provider in ER2
- Add Redirect URI
- Import OIDC Users
- Enable Single Sign-On in ER2.
Configure Microsoft Entra Account
Generate Client ID and Tenant ID Key
- With your administrator account, log in to the Azure app registration portal.
- In the App registrations page, click + New registration.
-
In the Register an application page, fill in the following fields:
Field Description Name Enter a descriptive display name. For example, ER2 OIDC. Supported account types Select Accounts in this organizational directory only. - Click Register. You will be redirected to the Overview page for the newly registered app, ER2 OIDC.
-
Take down the Application (client) ID and Directory (tenant) ID.
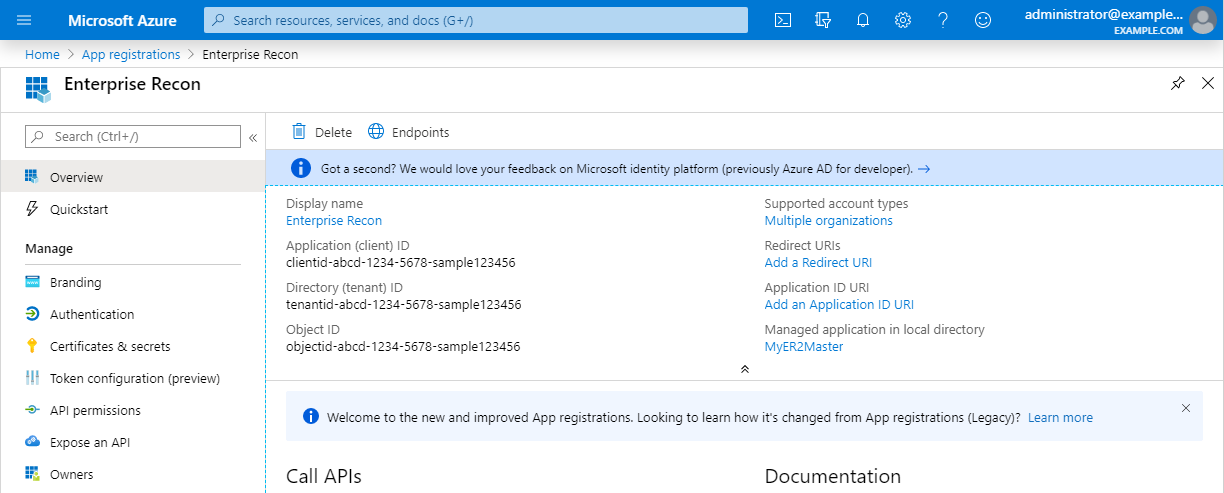
Generate Client Secret Key
- With your administrator account, log in to the Azure app registration portal.
- In the App registrations page, go to the Owned applications tab. Click on the app that you registered (e.g. ER2 OIDC) when generating the Client ID and Tenant ID key.
- In the Manage panel, click Certificates & secrets.
- In the Client secrets section, click + New client secret.
-
In the Add a client secret page, fill in the following fields:
Field Description Description Enter a descriptive label for the Client Secret key. Expires Select a validity period for the Client Secret key. -
Click Add. The Value column will contain the Client Secret key.
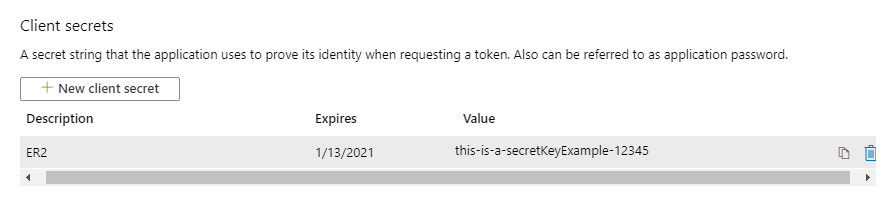
-
Copy and save the Client Secret key to a secure location.
Save your Client Secret key in a secure location. You cannot access this Client Secret key once you navigate away from the page.
Grant API Access
- With your administrator account, log in to the Azure app registration portal.
- In the App registrations page, go to the Owned applications tab. Click on the app that you registered (e.g. ER2 OIDC) when generating the Client ID and Tenant ID key.
- In the Manage panel, click API permissions.
- In the Configured permissions section, click + Add a permission.
- In the Request API permissions page, select Microsoft Graph.
-
Select the following permissions for the registered app (e.g., ER2 OIDC):
API Permissions - Under Application permissions, select 'Directory.Read.All'
- Click Add permissions.
- In the Configured permissions page, click on Grant admin consent for <organization name>.
- In the Grant admin consent confirmation dialog, click Yes. The Status column for all the newly added API permissions will be updated to "Granted for <organization name>".
Configure OIDC Provider in ER2
- Log in to the ER2 Web Console.
- Go to Users > OIDC Provider.
- On the OIDC Provider page, click Configure Provider.
- In the Configure OIDC Provider window, fill in the following fields:
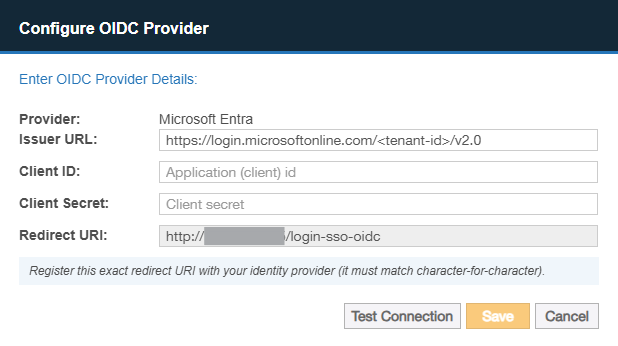
Field Description Provider This field is auto-populated and cannot be edited.
Issuer URL In the auto-populated URL, replace <tenant_id> with the actual tenant ID generated in Generate Client ID and Tenant ID Key.
Client ID Enter the client ID generated in Generate Client ID and Tenant ID Key. Client Secret Enter the client secret key generated in Generate Client Secret Key. Redirect URI Copy the auto-populated redirect URI. You will use this to Add Redirect URI. - Click Test Connection. If ER2 can connect to the provider, the Save button gets enabled.
- Click Save.
You can find the list of users available for import in the User Accounts > Import from OIDC > OIDC Users page.
Add Redirect URI
- With your administrator account, log in to the Azure app registration portal.
- In the App registrations page, go to the Owned applications tab.
- Click on the app that you registered (e.g. ER2 OIDC) when generating the Client ID and Tenant ID key.
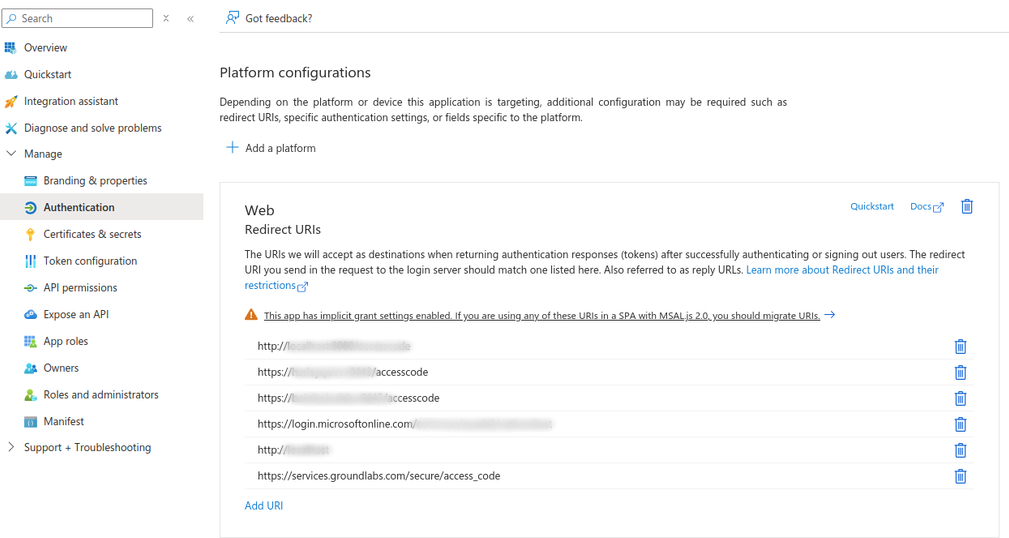
- In the Manage panel, click Authentication.
-
In the list of redirect URIs, add the redirect URI copied in Configure OIDC Provider in ER2.
Import OIDC Users
After configuring the OIDC provider in ER2, the list of available users will be shown in the Users > User Accounts > Import from OIDC > OIDC Users page.
- Log in to the ER2 Web Console.
- Go to Users > User Accounts.
- On the Users > OIDC Provider page, click Import from OIDC.
- Under OIDC Users tab, in the search bar, enter the user information
(e.g., name, email, UPN, or group name) of the user account.
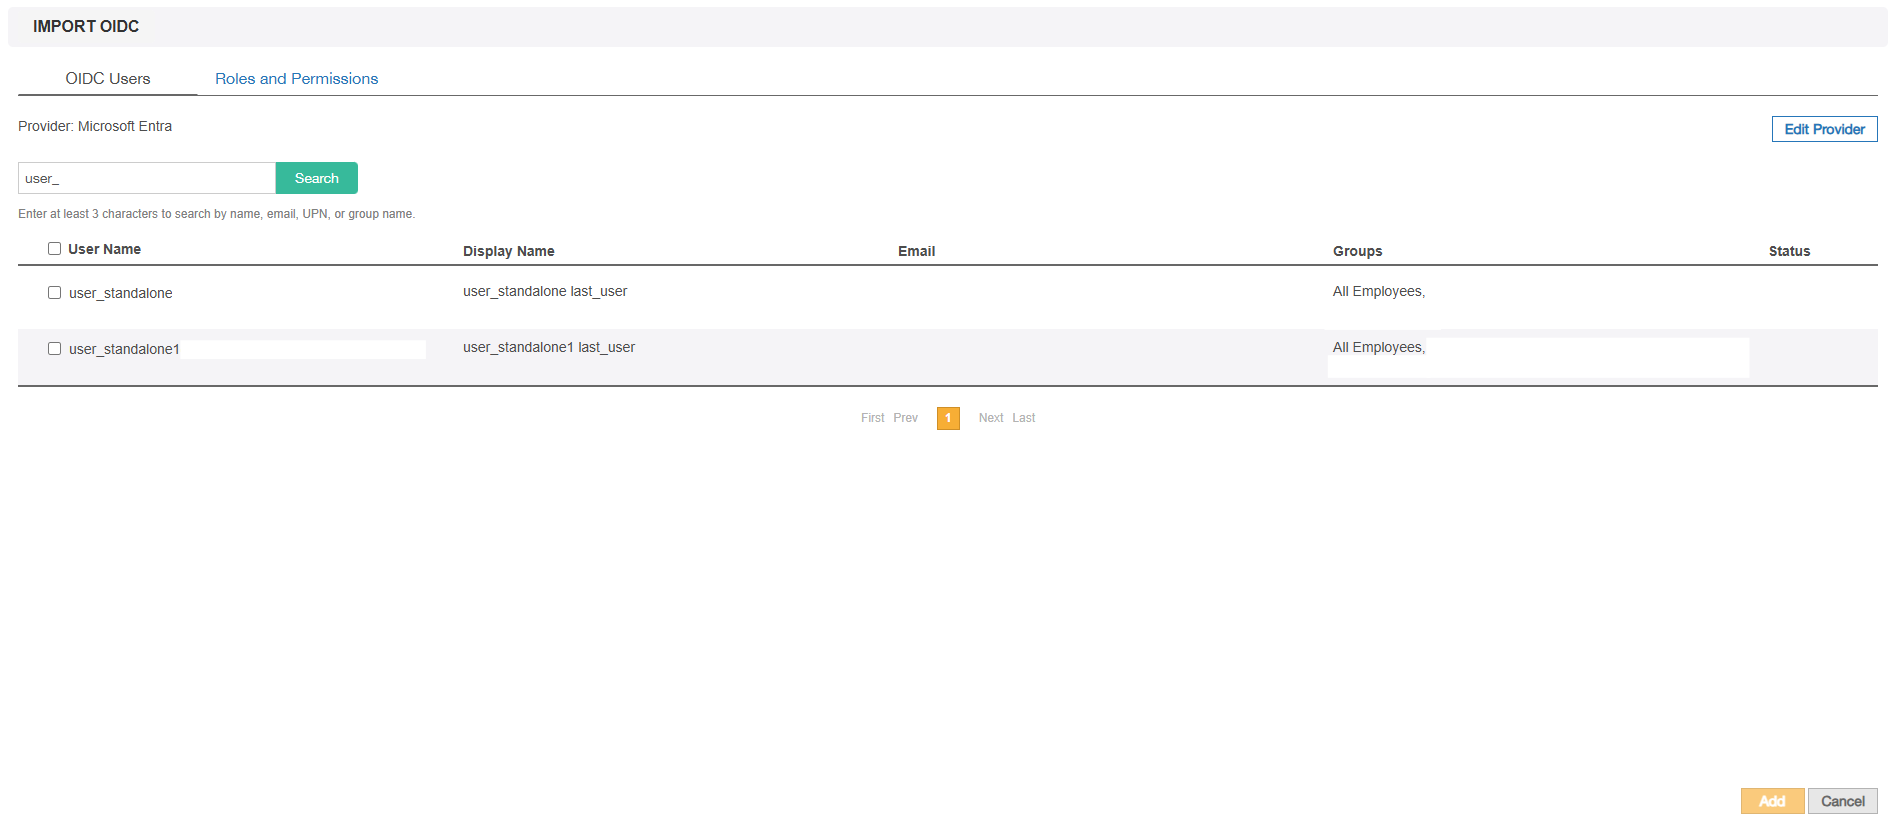
- After selecting the users, click Add.
Enable Single Sign-On in ER2
For the allowed users to be able to login via SSO to ER2, ensure that you have enabled the Single Sign-On (OIDC) feature in Settings > Login Policy > Login Types.
For more information, see Login Policy.